DevOps PBL: DevOps Tooling Site
Software Engineer | Technical Writer
Bread and butter from React and Rails, but currently exploring Linux System Administration and Cloud Solutions/DevOps.
Learning everyday. Follow along with my series on creating Chrome Extensions, Desktop Apps (soon), and PWAs.
We want to implement a tooling website solution that makes access to DevOps tools within the corporate infrastructure easily accessible.
The tools we want our team to be able to use are well-known and widely used by multiple DevOps teams, so we will introduce a single DevOps Tooling Solution that will consist of these tools:
Jenkins – free and open source automation server used to build CI/CD pipelines.
Kubernetes – open-source container-orchestration system for automating computer application deployment, scaling, and management.
Jfrog Artifactory – Universal Repository Manager supporting all major packaging formats, build tools and CI servers. Artifactory.
Rancher – an open-source software platform that enables organizations to run and manage Docker and Kubernetes in production.
Grafana – a multi-platform open-source analytics and interactive visualization web application.
Prometheus – An open-source monitoring system with a dimensional data model, flexible query language, efficient time series database and modern alerting approach.
Kibana – Kibana is a free and open user interface that lets you visualize your Elasticsearch data and navigate the Elastic Stack.
In this project you will implement a solution that consists of the following components:
Infrastructure: AWS
Webserver Linux: RHEL 9
Database Server: Ubuntu 22.04 + MySQL
Storage Server: RHEL 9 + NFS Server
Programming Language: PHP
Code Repository: GitHub
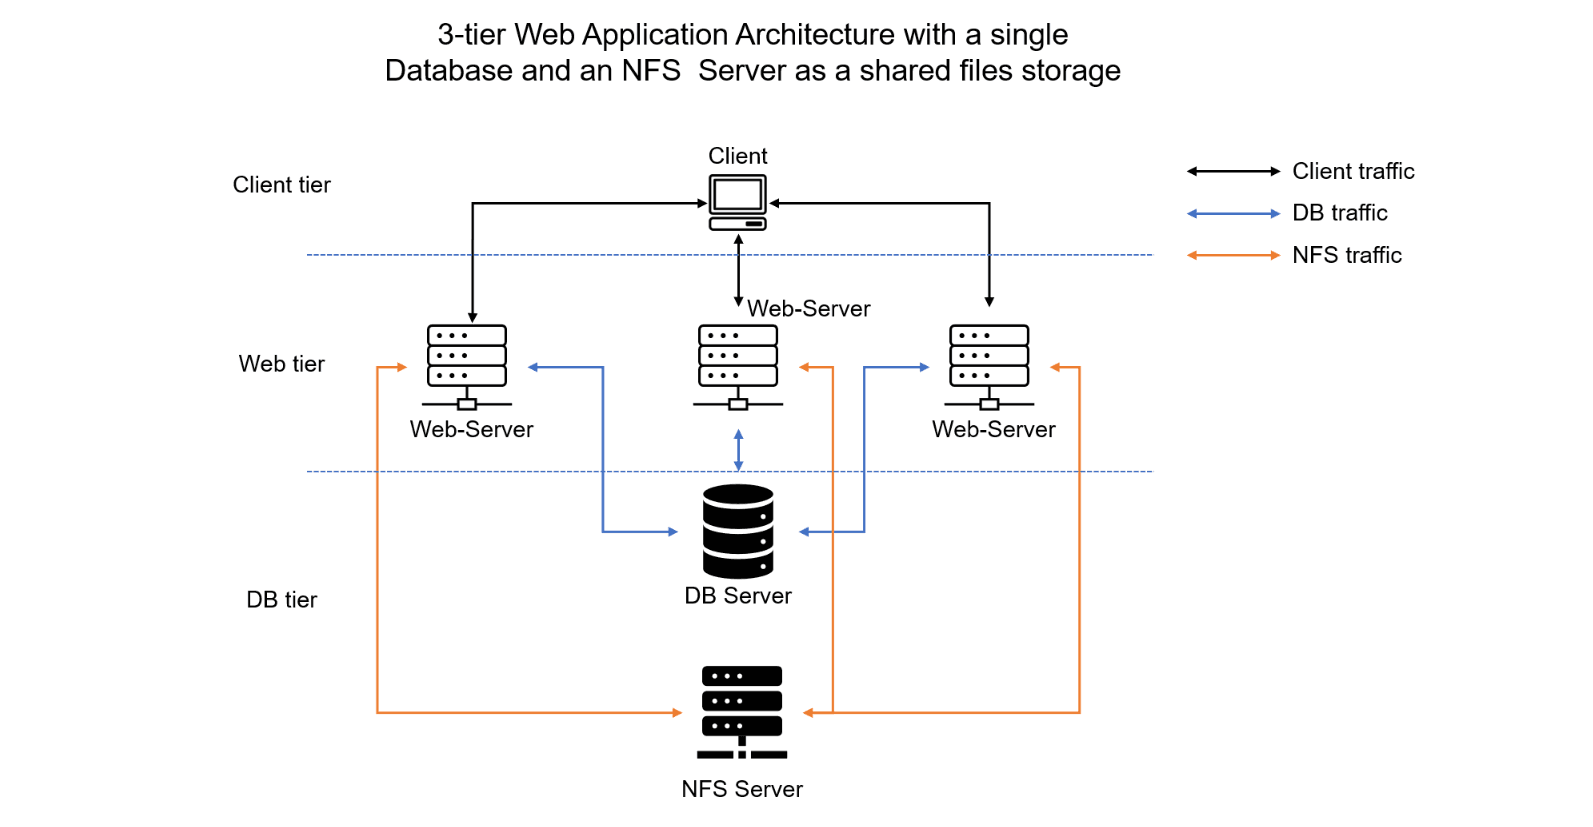
In the diagram below you can see a common pattern where several stateless Web Servers share a common database and also access the same files using Network File System (NFS) as shared file storage. Even though the NFS server might be located on completely separate hardware for Web Servers it will resemble a local file system from where they can serve the same files.
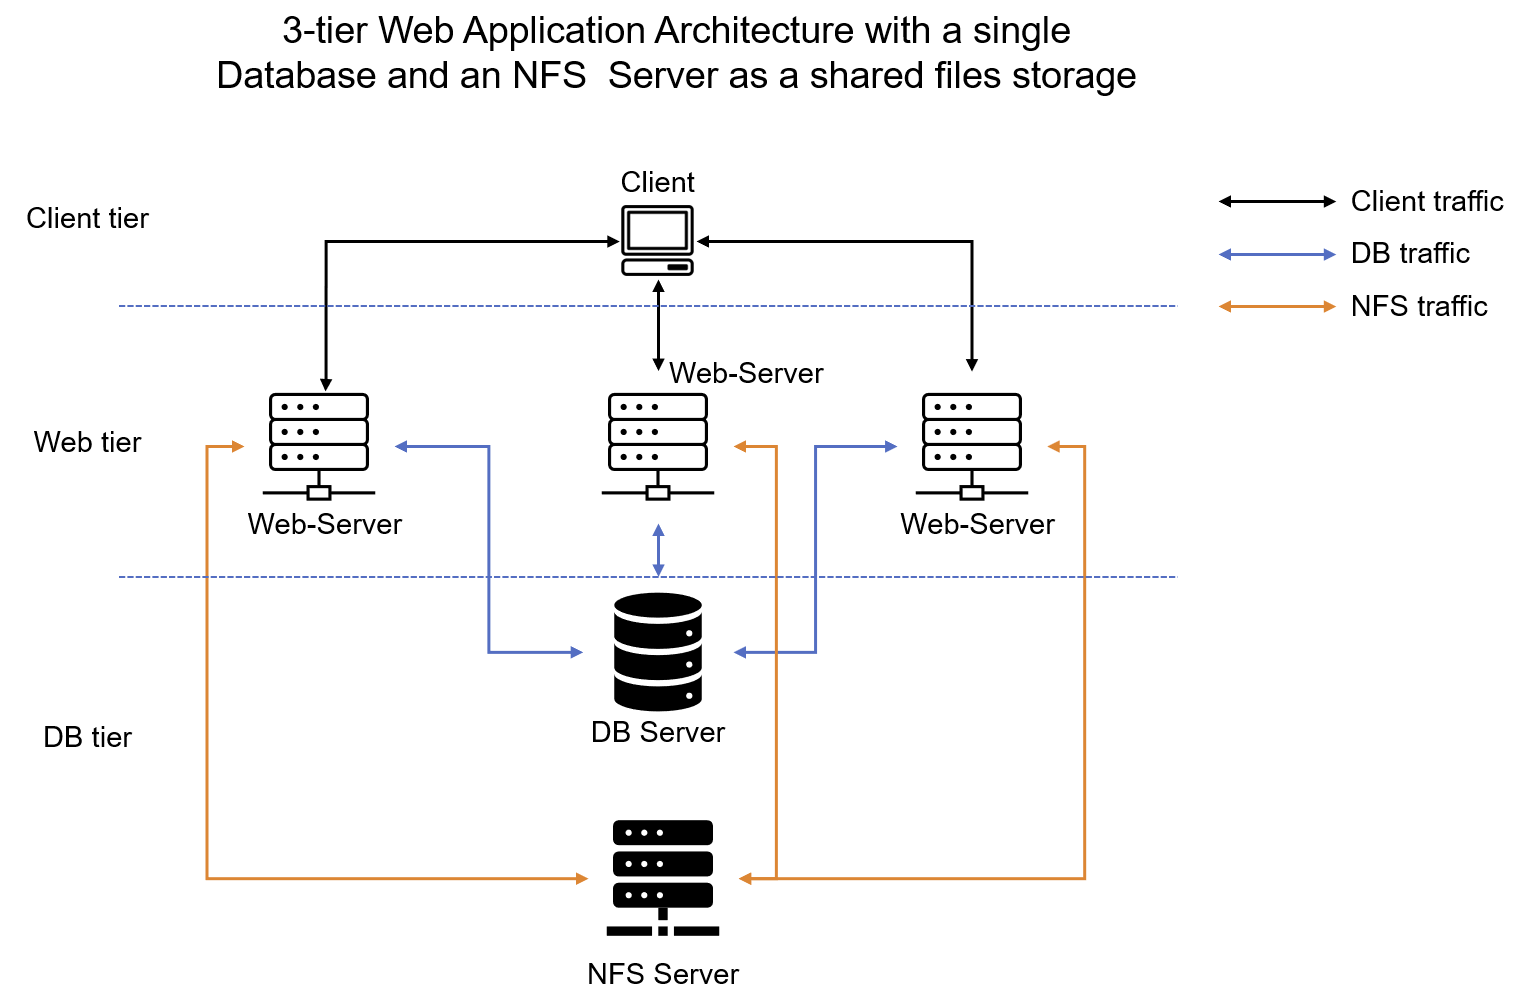
It is important to know what storage solution is suitable for what use cases, thus we need to ask the following questions: what data will be stored, in what format, how this data will be accessed, by whom, from where, how frequently, etc. Based on this we will be able to choose the right storage system for your solution.
Step 1: Prepare NFS Server
Setup LVM on RHEL 9 OS
This setup will be very similar to the last project's LVM setup. To avoid extra work on my end of rewriting the same steps, I instead will embed the setup from the last project as a gist here. Notable changes we want to account for are:
Formatting the disks as
xfsinstead ofext4The volume names will be
opt-lv,apps-lv, andlogs-lvMount points will be on
/mntdirectory for the logical volumes as follows:Mount
lv-appson/mnt/apps– To be used by web serversMount
lv-logson/mnt/logs– To be used by web server logsMount
lv-opton/mnt/opt– To be used by the Jenkins server in Next Project
Here's our setup of the logical volumes:

Mount the logical volumes:
sudo mkdir -p /mnt/apps /mnt/logs /mnt/opt

# syncing logs and mounting
sudo rsync -av /var/log /mnt/logs
sudo mount /dev/nfsdata-vg/logs-lv /mnt/logs
sudo rsync -av /mnt/logs/ /var/log

# mount apps-lv & opt-lv
sudo mount /dev/nfsdata-vg/apps-lv /mnt/app
sudo mount /dev/nfsdata-vg/opt-lv /mnt/opt
We can view our newly created mounts. We can see the target (/mnt/logs), source (/dev/mapper/nfsdata-vg-logs--lv), and fstype (xfs).
sudo findmnt | grep '/mnt'

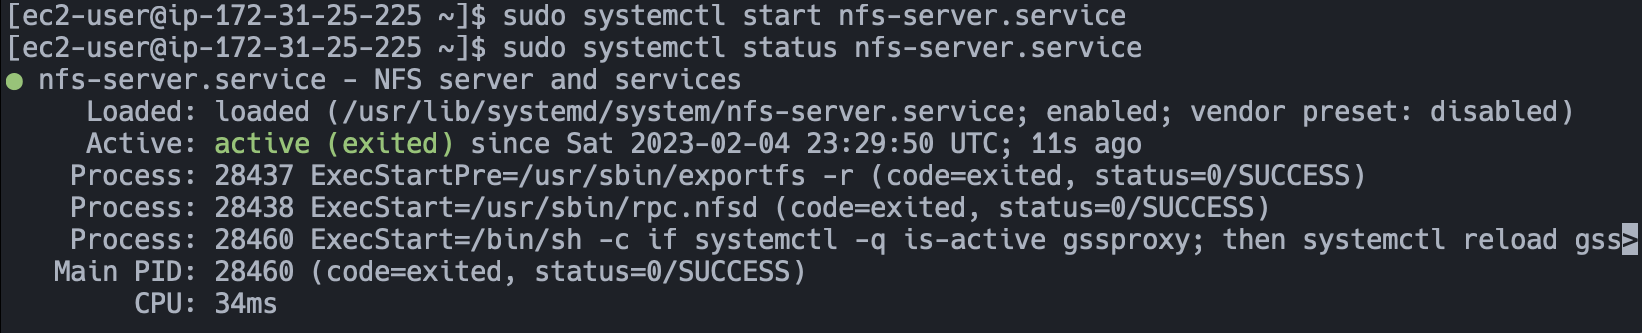
Install the NFS server, configure it to start on reboot and make sure it is up and running:
sudo yum -y update
sudo yum -y install nfs-utils
sudo systemctl enable nfs-server.service
sudo systemctl start nfs-server.service
sudo systemctl status nfs-server.service
Set up permissions that will allow our Web servers to read, write and execute files on NFS.
sudo chown -R nobody: /mnt/apps
sudo chown -R nobody: /mnt/logs
sudo chown -R nobody: /mnt/opt

sudo chmod -R 777 /mnt/apps
sudo chmod -R 777 /mnt/logs
sudo chmod -R 777 /mnt/opt
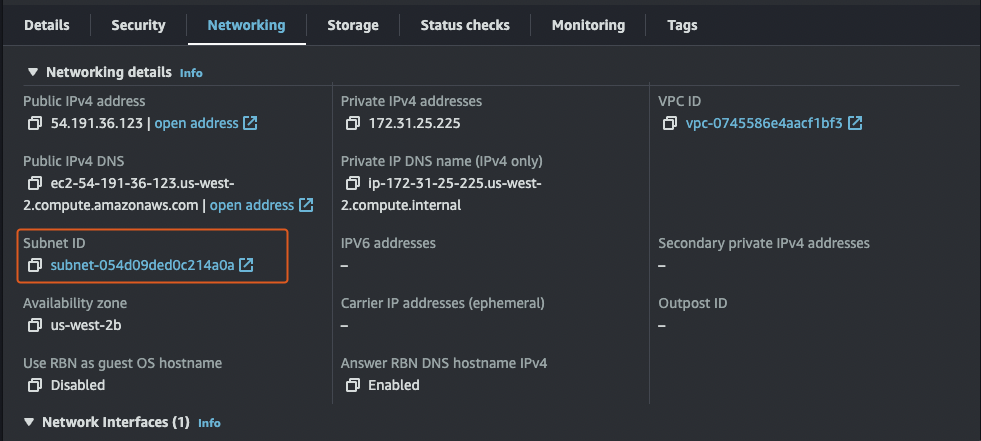
Furthermore, we want our webservers (not created yet) to be able to access our mounts as clients. For simplicity, the webservers will all be installed within the same subnet.
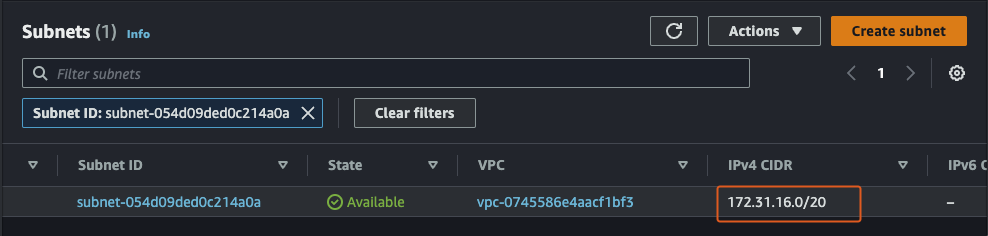
We need to retrieve out subnet cidr value to configure access to our NFS for our web servers. The subnet value can be found within the instance Networking tab and following the subnet link:
sudo vi /etc/exports
# /etc/exports
/mnt/apps 172.31.16.0/20(rw,sync,no_all_squash,no_root_squash)
/mnt/logs 172.31.16.0/20(rw,sync,no_all_squash,no_root_squash)
/mnt/opt 172.31.16.0/20(rw,sync,no_all_squash,no_root_squash)
# exit vi
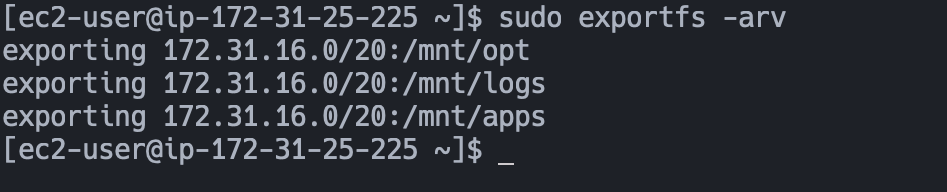
sudo exportfs -arv
Use rcpinfo -p | grep nfs to check the port used by NFS and include it as a rule in the Security Groups.
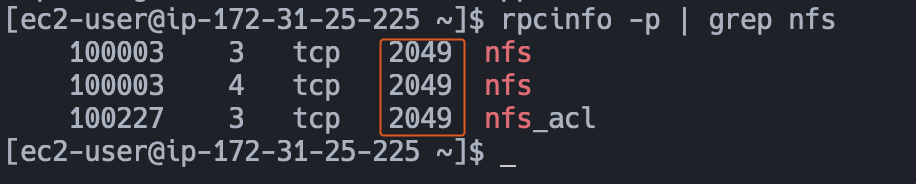
From the above, we need to open port 2049. Additionally, to allow access to our NFS server from clients, we also need to open TCP 111, UDP 111, and UDP 2049. With all these related rules to our NFS, I created a specific SG for it. The source field is our subnet cidr.

Configure the Database Server
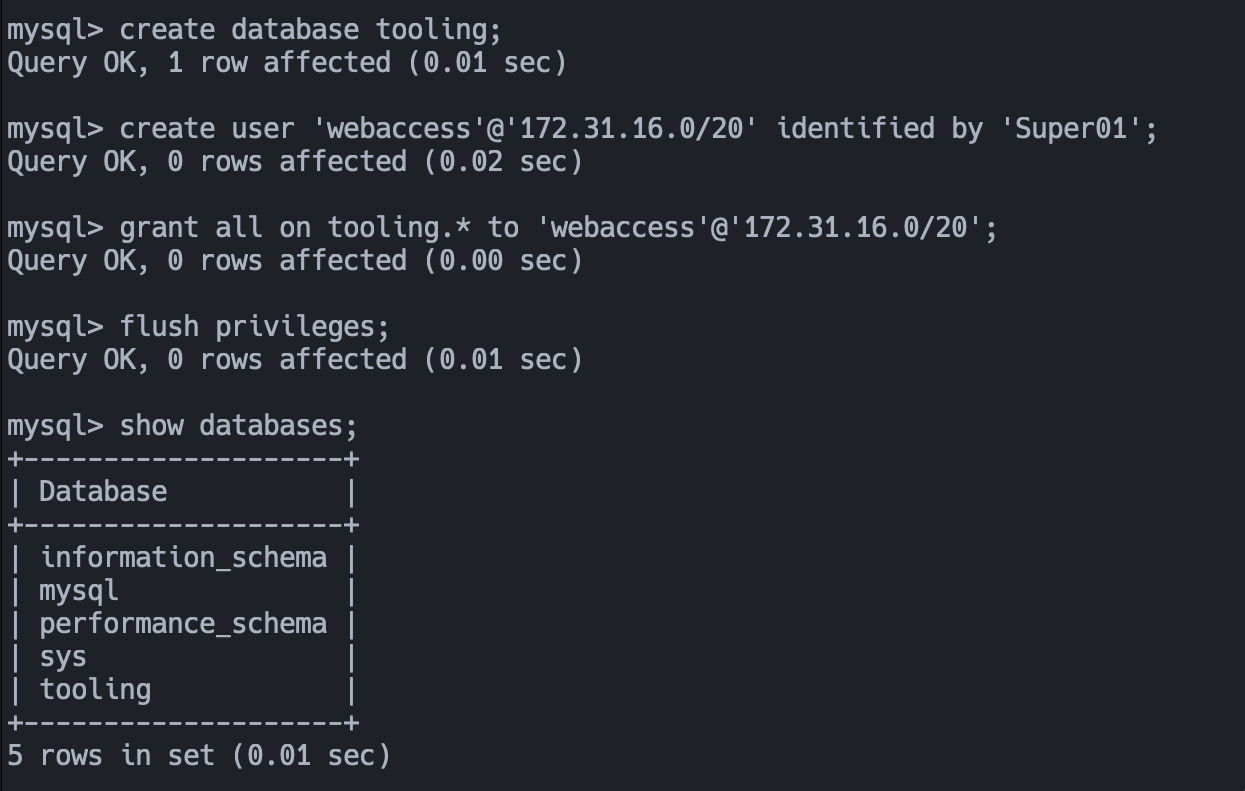
As we have done multiple times in previous projects, we want to install MySQL, create a database and user, and grant the user access to the database from the webservers subnet cidr:
sudo yum -y update
sudo yum -y install mysql-server

# start the mysql services
sudo systemctl enable mysqld
sudo systemctl restart mysqld
Prepare the Web Servers
Our Web Servers need to be able to serve the same content from shared storage solutions, in our case – NFS Server and MySQL database. We have already seen how to access a MySQL server from a client. For storing shared files that our Web Servers will use – we will utilize NFS and mount previously created Logical Volume apps-lv to the folder where Apache stores its files to be served to the users (/var/www).
This approach will make our Web Servers stateless, which means we will be able to add new ones or remove them whenever we need, and the integrity of the data (in the database and on NFS) will be preserved.
In the next steps, we will do the following 3 times:
Launch an RHEL 9 EC2 instance
Configure the NFS client (this step must be done on all three servers)
Deploy a Tooling application to our Web Servers into a shared NFS folder
Configure the Web Servers to work with a single MySQL database
We need to first install our NFS client on our Web Server instances:
sudo yum -y install nfs-utils nfs4-acl-tools
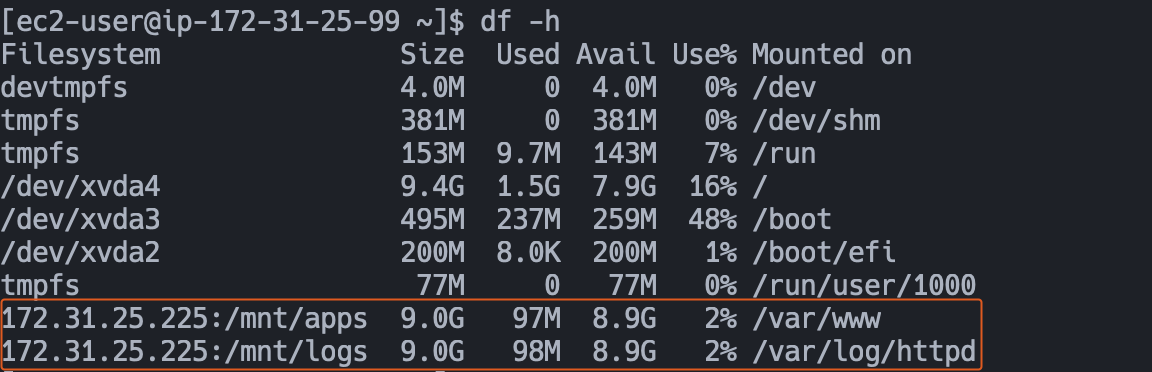
Then mount /var/www/ and target the NFS server's export for `apps`. We should see the NFS mounted on our web server:
sudo mkdir /var/www
sudo mount -t nfs -o rw,nosuid 172.31.25.225:/mnt/apps /var/www
sudo mount -t nfs -o rw,nosuid 172.31.25.225:/mnt/logs /var/log/httpd
df -h
Additionally, we can persist the above changes by adding them to our /etc/fstab :
# /etc/fstab
172.31.25.225:/mnt/apps /var/www nfs defaults 0 0
172.31.25.225:/mnt/logs /var/log/httpd nfs defaults 0 0
Install Remi’s repository, Apache and PHP
sudo yum -y install httpd

sudo dnf -y install https://dl.fedoraproject.org/pub/epel/epel-release-latest-9.noarch.rpm

sudo dnf -y install dnf-utils http://rpms.remirepo.net/enterprise/remi-release-9.rpm

sudo dnf -y module reset php

sudo dnf -y module enable php:remi-8.1

sudo dnf -y install php php-opcache php-gd php-curl php-mysqlnd

sudo systemctl enable php-fpm

sudo systemctl start php-fpm

sudo setsebool -P httpd_execmem 1
We can ascertain that our NFS is mounted properly on our web server by verifying that both /var/www in our Web Server(s) and /mnt/apps in our NFS have the same Apache files and directories. Apply the same verification for our logs - /var/log for our Web Servers and /mnt/logs for our NFS.


Fork the tooling source code from Darey.io Github Account to your Github account.
Deploy the tooling website’s code to the Webserver. Ensure that the html folder from the repository is deployed to
/var/www/html
cd /var/www/html
sudo git clone https://github.com/cdrani/tooling.git
sudo mv tooling/. .
sudo mv -R html/. .
sudo rm -R html
Again our web servers should have the files in /var/www/html:


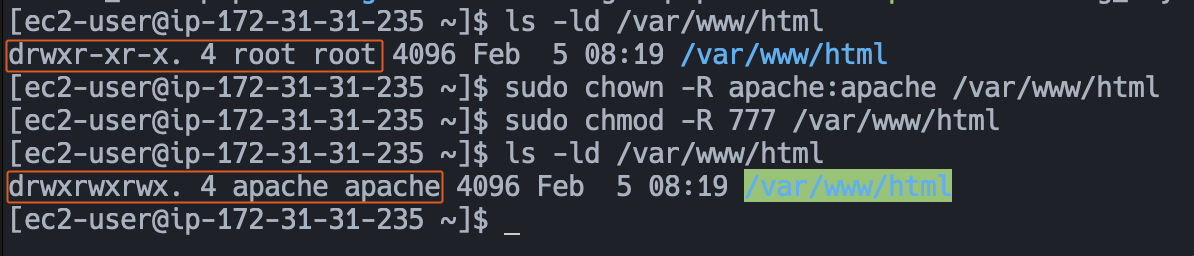
We need to update permissions on /var/www/html
Update the website’s configuration to connect to the database (in /var/www/html/functions.php file). We will make use of the webaccess user with a password of Super01! we created earlier which has access to the `tooling` database:
$db = mysqli_connect('<DB Server Private IP Address>', '<MySQL username>', '<MySQL password>', '<Database>');

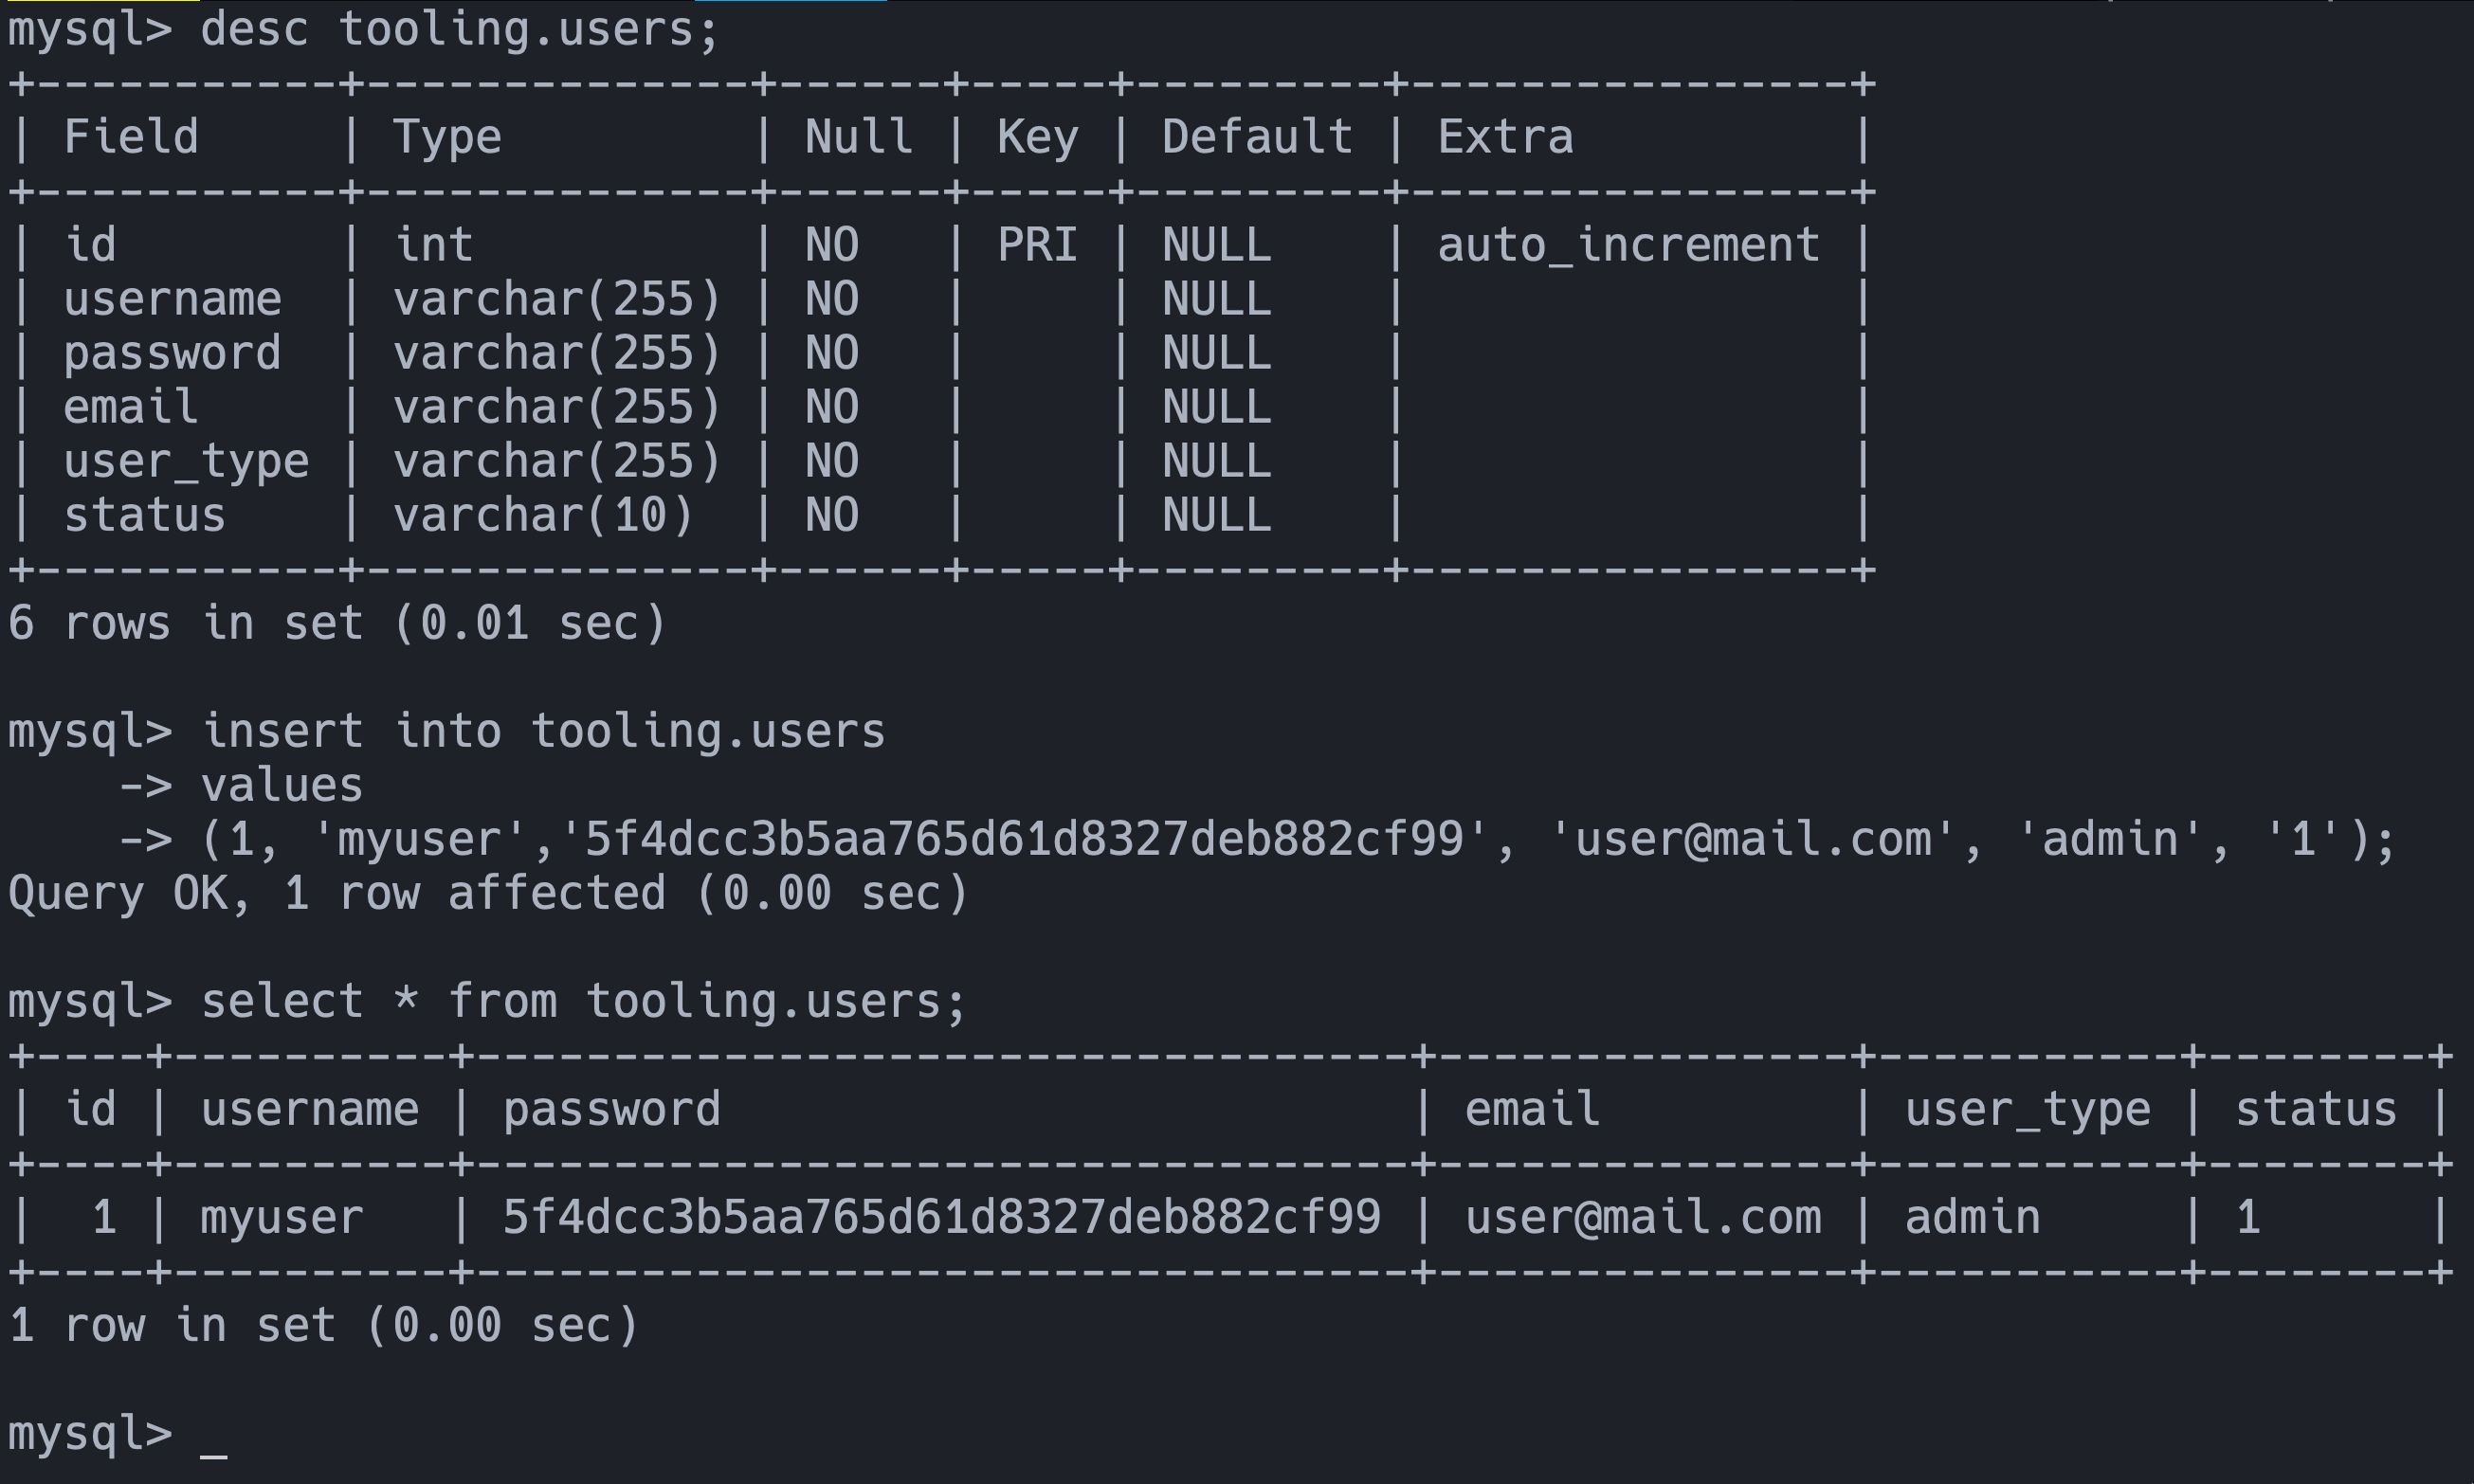
Now we need to set up a users table in our tooling database. Fortunately, we already have a pre-configured /var/www/html/tooling-db.sql file that will create a users table for us. All we have to do is import it into our tooling database. We can import tooling-db.sql script to our database with this command mysql -h <databse-private-ip> -u <db-username> -p <db-pasword> < tooling-db.sql.
# mysql -h <databse-private-ip> -u <db-username> -p <db-pasword> < tooling-db.sql
mysql -u webaccess -h 172.31.18.126 -p tooling < /var/www/html/tooling-db.sql
sudo sed -i 's/SELINUX=enforcing/SELINUX=disabled/' /etc/sysconfig/selinux
sudo setenforce 0
sudo systemctl restart httpd
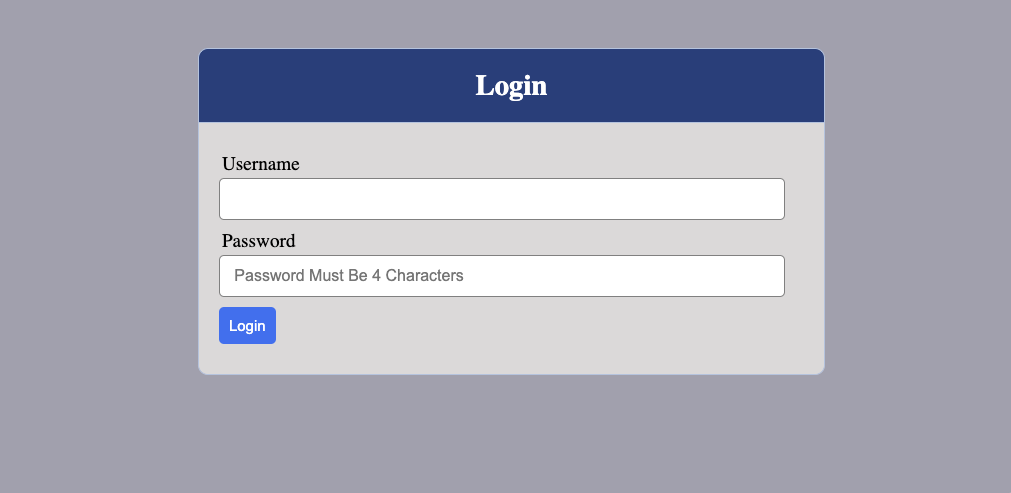
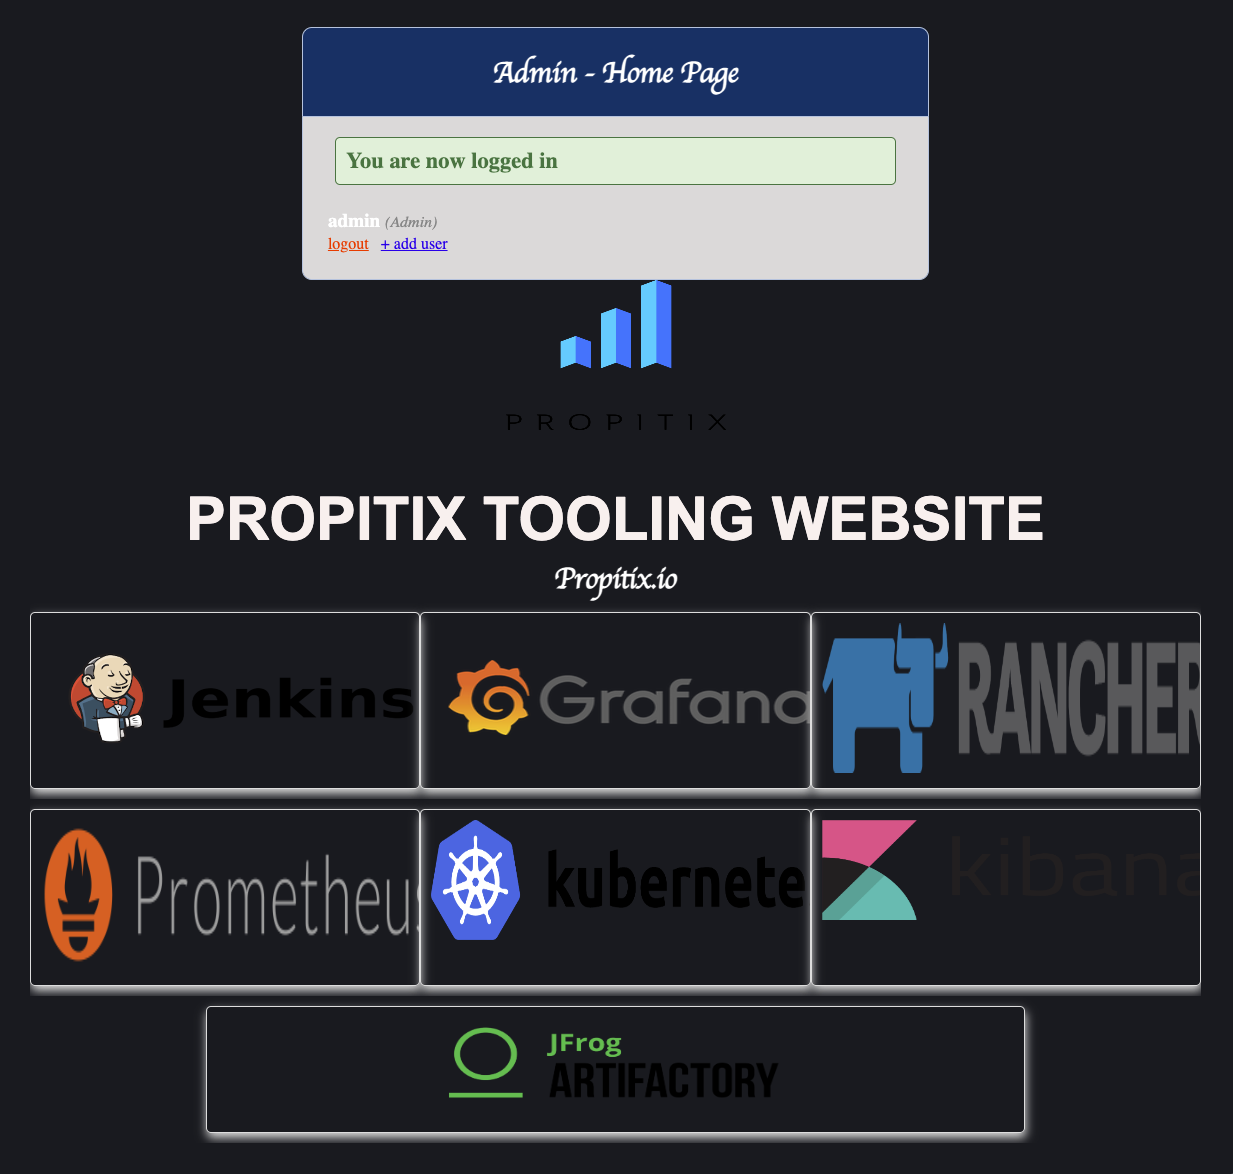
Visiting either of our web servers (http://<Public IP Address>/index.php) should display the following login page and home page upon entering our credentials:
Learning Outcomes
Configure an NFS client.
Deploy a Tooling application to our Web Servers into a shared NFS folder.
Configure the Web Servers to work with a single MySQL database.