DevOps PBL: WordPress Web Solution
Software Engineer | Technical Writer
Bread and butter from React and Rails, but currently exploring Linux System Administration and Cloud Solutions/DevOps.
Learning everyday. Follow along with my series on creating Chrome Extensions, Desktop Apps (soon), and PWAs.
For this project, we want to prepare storage infrastructure on two Linux servers and implement a basic web solution using WordPress.
Configure storage subsystem for Web and Database servers based on Linux OS. The focus of this part is to give you practical experience in working with disks, partitions and volumes in Linux.
Install WordPress and connect it to a remote MySQL database server. This part of the project will solidify your skills in deploying Web and DB tiers of Web solutions.
Three-tier Architecture is a client-server software architecture pattern that comprises 3 separate layers.
Presentation Layer (PL): This is the user interface such as the client-server or browser on your laptop.
Business Layer (BL): This is the backend program that implements business logic. It can be an Application and/or Webserver.
Data Access or Management Layer (DAL): This is the layer for computer data storage and data access. Database Server or File System Server such as FTP server, or NFS Server.
Our 3-Tier Setup
A Laptop or PC to serve as a client
An EC2 Linux Server as a web server (This is where we will install WordPress)
An EC2 Linux server as a database (DB) server
STEP 1: Setup Web Server
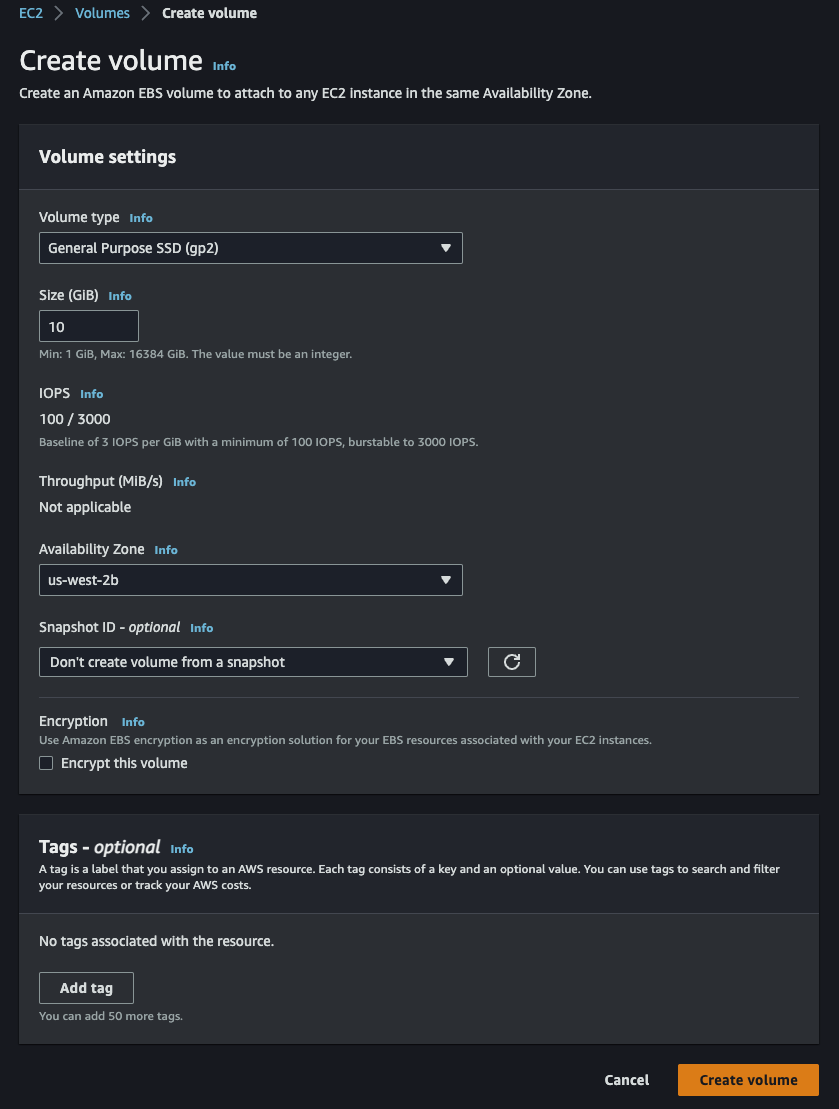
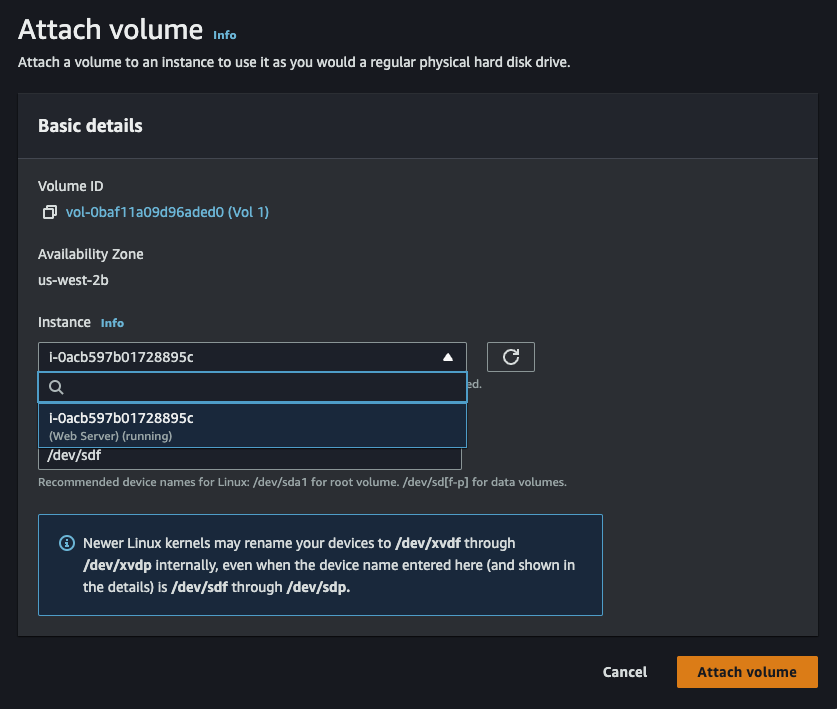
We will use an RHEL9 instance as our server. Additionally, we need to create and attach three 10GB volumes to our instance.

The volume must be in the same Availability Zone as the instance:
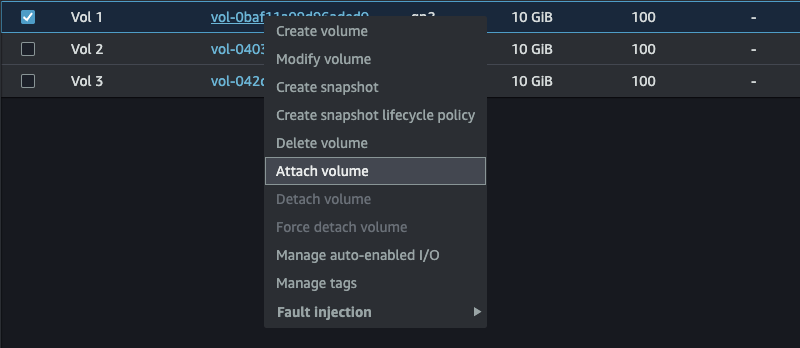
Make sure to select the correct instance for which to attach the volumes:
Volume Configuration
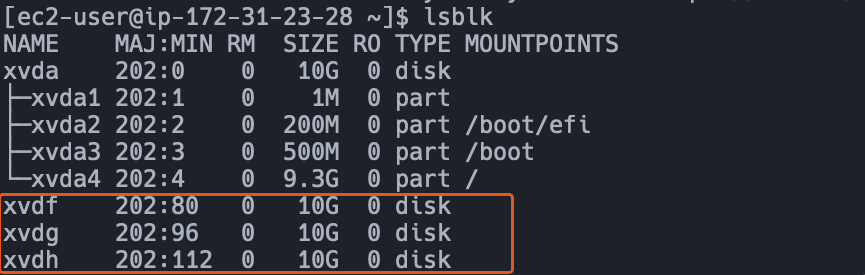
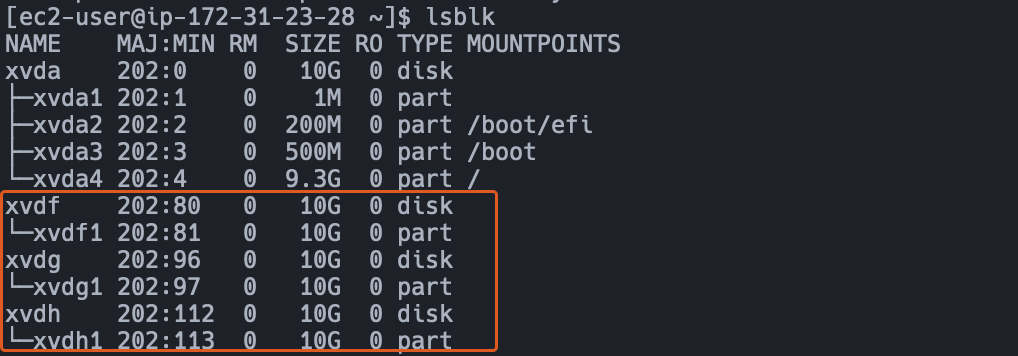
Use lsblk command to inspect what block devices are attached to the server. The three newly created block devices will likely have names like xvdf, xvdh, and xvdg .
lsblk
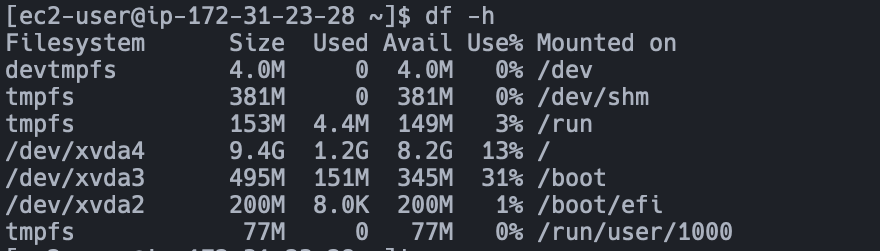
We can use df -h to view all mounts and free space on our instance
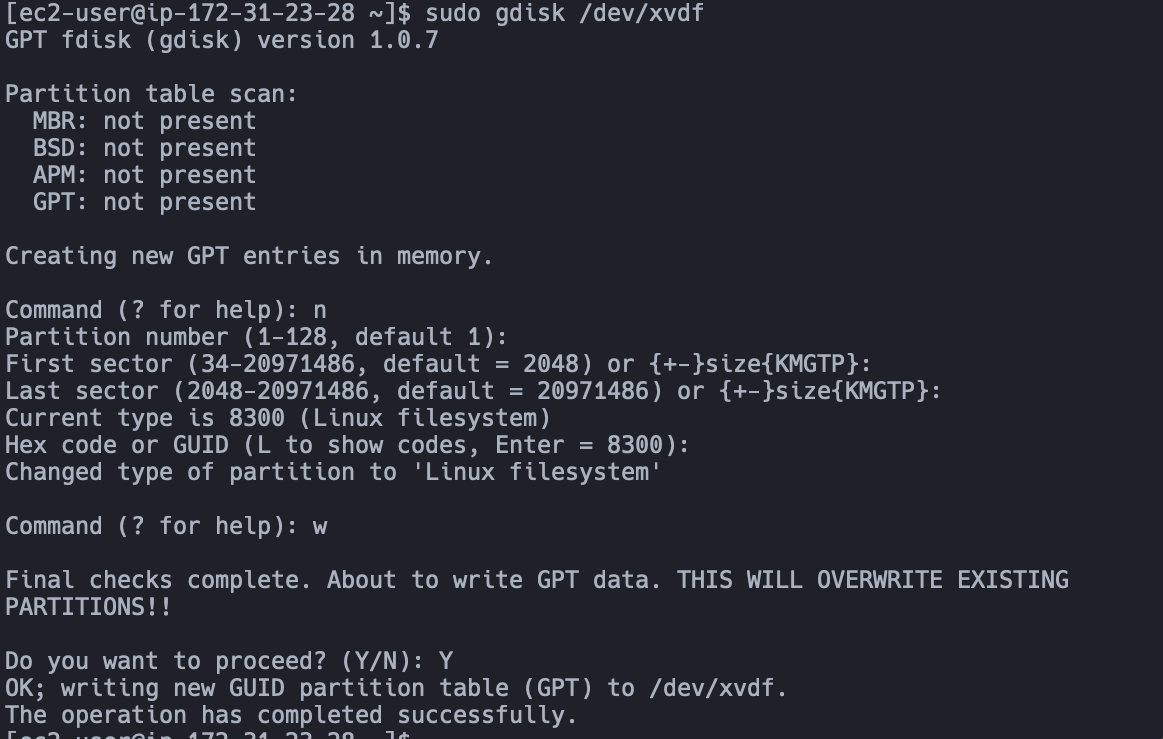
Use the gdisk utility to create a single partition on each of the 3 disks. The utility is interactive with some command options. We only need to make use of the n to create a new partition and w to save the new partition to the disk and exit.
# sudo gdisk <disk>
sudo gdisk /dev/xvdf
sudo gdisk /dev/xvdg
sudo gdisk /dev/xvdh
Here's an example of partitioning one of the disks using the default (pressing ENTER/RETURN key):
We can now see the partitions we created in each disk now:
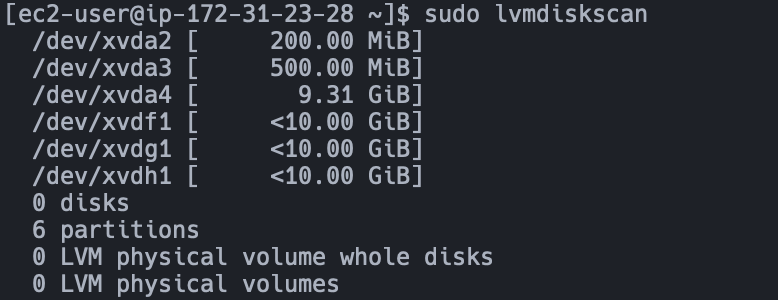
Run sudo lvmdiskscan command to check for available partitions and the type of volumes
sudo yum install -y lvm2
sudo lvmdiskscan
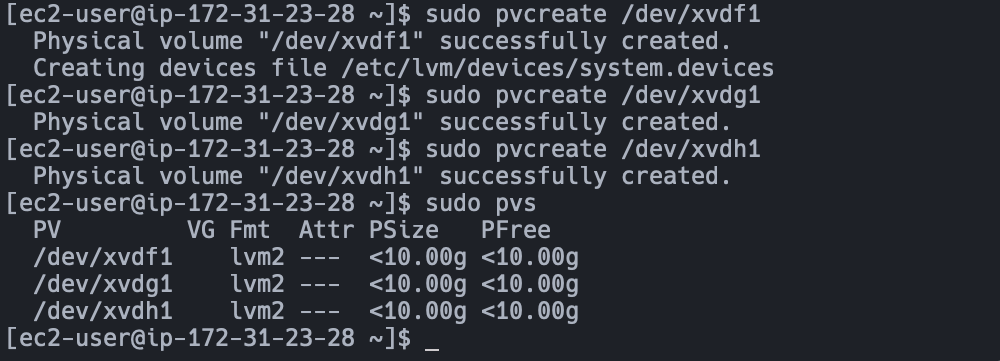
Use pvcreate utility to mark each of the 3 disks as physical volumes (PVs) to be used by LVM.
sudo pvcreate /dev/xvdf1
sudo pvcreate /dev/xvdg1
sudo pvcreate /dev/xvdh1
sudo pvs
Use vgcreate utility to add all 3 PVs to a volume group (VG). Name the VG webdata-vg. We can verify the creation of the VG using sudo vgs :
sudo vgcreate webdata-vg /dev/xvdf1 /dev/xvdg1 /dev/xvdh1
sudo vgs

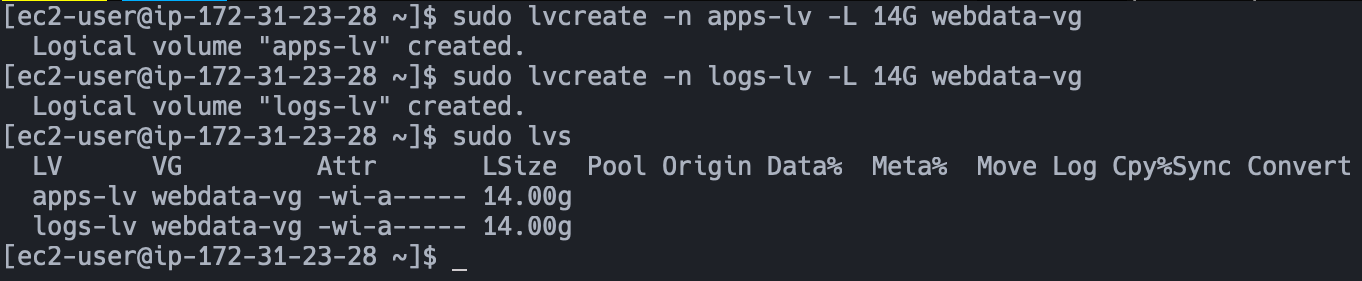
Use lvcreate utility to create 2 logical volumes. apps-lv (Use half of the PV size), and logs-lv Use the remaining space of the PV size. NOTE: apps-lv will be used to store data for the Website while logs-lv will be used to store data for logs.
sudo lvcreate -n apps-lv -L 14G webdata-vg
sudo lvcreate -n logs-lv -L 14G webdata-vg
sudo vgs
Verify the entire setup:
sudo vgdisplay -v #view complete setup - VG, PV, and LV
sudo lsblk
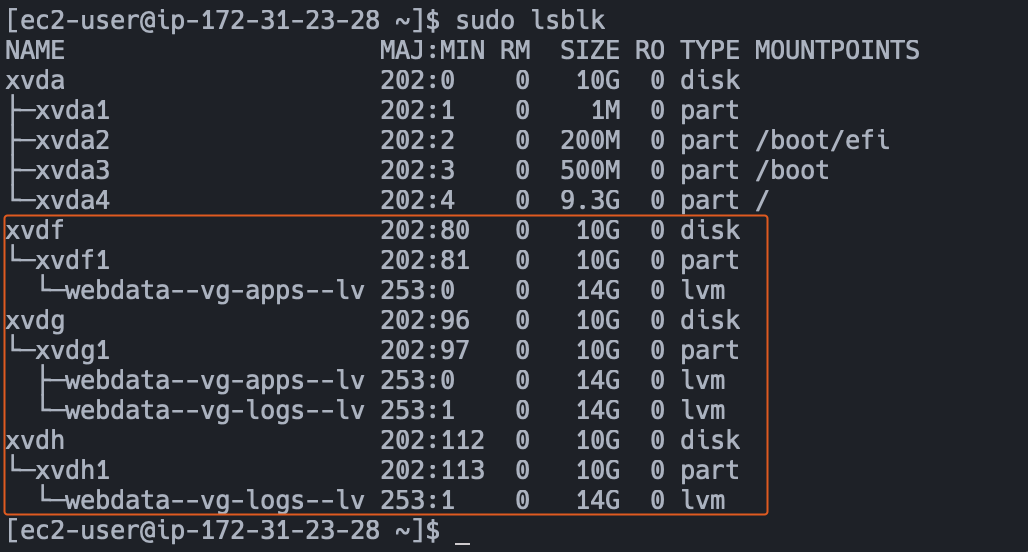
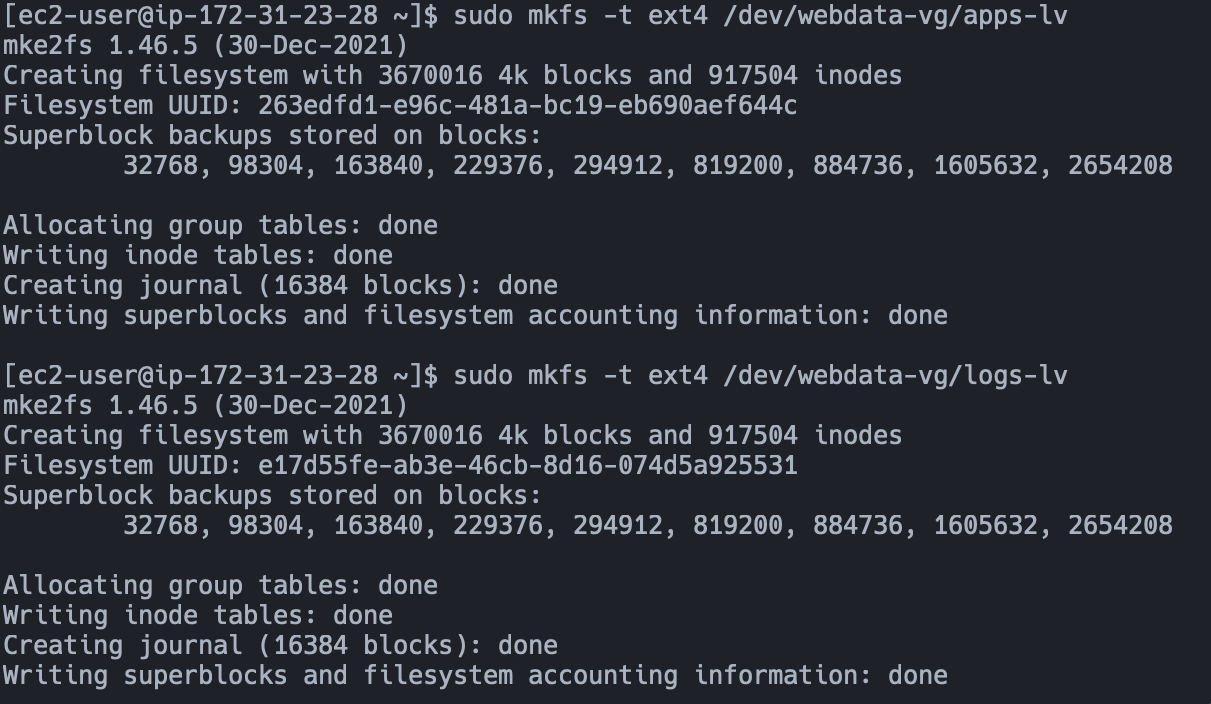
From above we can see that apps-lv and logs-lv are of type lvm, but we want to reformat it to an ext4 filesystem.
sudo mkfs -t ext4 /dev/webdata-vg/apps-lv
sudo mkfs -t ext4 /dev/webdata-vg/logs-lv
Create /var/www/html directory to store website files and mount them on apps-lv LV.
sudo mkdir -p /var/www/html
sudo mount /dev/webdata-vg/apps-lv /var/www/html
We follow the same step as above for the logs, but first, we need to back up the files in /var/log using rsync before mounting it on the new destination folder:
sudo mkdir -p /home/recovery/logs
sudo rsync -av /var/log/ /home/recovery/logs/
sudo mount /dev/webdata-vg/logs-lv /var/log
sudo rsync -av /home/recovery/logs/. /var/log
Update /etc/fstab file
The UUID of the device will be used to update the /etc/fstab file.
sudo blkid | grep 'webdata'

The /etc/fstab file stores static information about filesystems, their mount points and mount options. This file is read at boot time to determine the overall file system structure, and thereafter when a user executes the mount command to modify that structure.

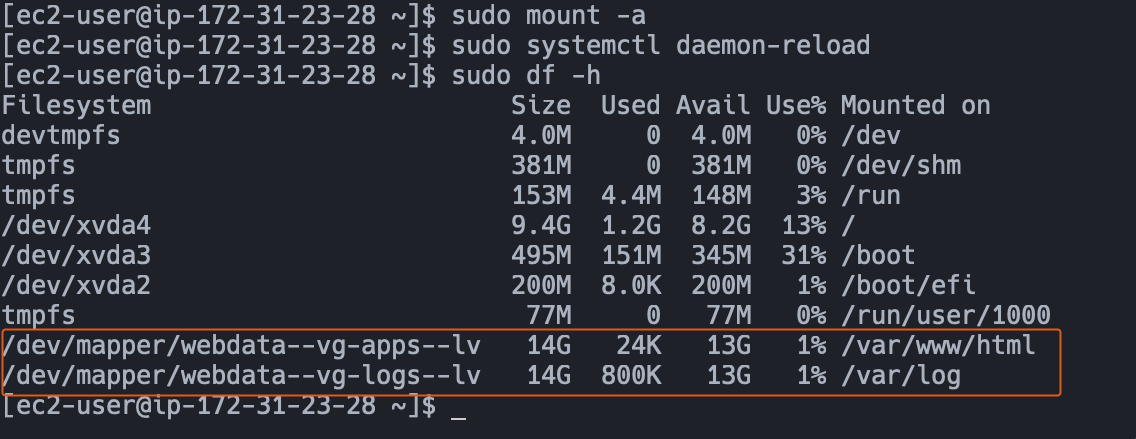
Test the configuration, reload the daemon, and verify the setup:
sudo mount -a
sudo systemctl daemon-reload
sudo df -h
Install WordPress on WebServer
Install Apache and its dependencies and start the web server:
sudo yum -y update
sudo yum -y install wget httpd php php-mysqlnd php-fpm php-json

sudo systemctl enable httpd
sudo systemctl start httpd
Install PHP and its dependencies:
sudo yum install https://dl.fedoraproject.org/pub/epel/epel-release-latest-9.noarch.rpm
sudo yum install yum-utils http://rpms.remirepo.net/enterprise/remi-release-9.rpm

sudo yum module list php
sudo yum module reset php
sudo yum module enable php:remi-8.1

sudo yum -y install php php-opcache php-gd php-curl php-mysqlnd

sudo systemctl enable php-fpm
sudo systemctl start php-fpm

sudo setsebool -P httpd_execmem 1

sudo systemctl restart httpd
Download WordPress
mkdir wordpress; cd wordpress;

wget http://wordpress.org/latest.tar.gz
sudo tar xzvf latest.tar.gz
rm -rf latest.tar.gz

cp wordpress/wp-config-sample.php wordpress/wp-config.php
cp -R wordpress /var/www/html/
Configure SELinux Policies
sudo chown -R apache:apache /var/www/html/wordpress
sudo chcon -t httpd_sys_rw_content_t /var/www/html/wordpress -R
sudo setsebool -P httpd_can_network_connect=1
Setup Database Server
Launch a second RedHat EC2 instance that will have a role – ‘DB Server’
Repeat the same steps as for the Web Server, but instead of apps-lv create db-lv and mount it to /db directory instead of /var/www/html/.
Install MySQL on DB Server
sudo yum -y update
sudo yum -y install mysql-server

sudo systemctl enable mysqld
sudo systemctl restart mysqld

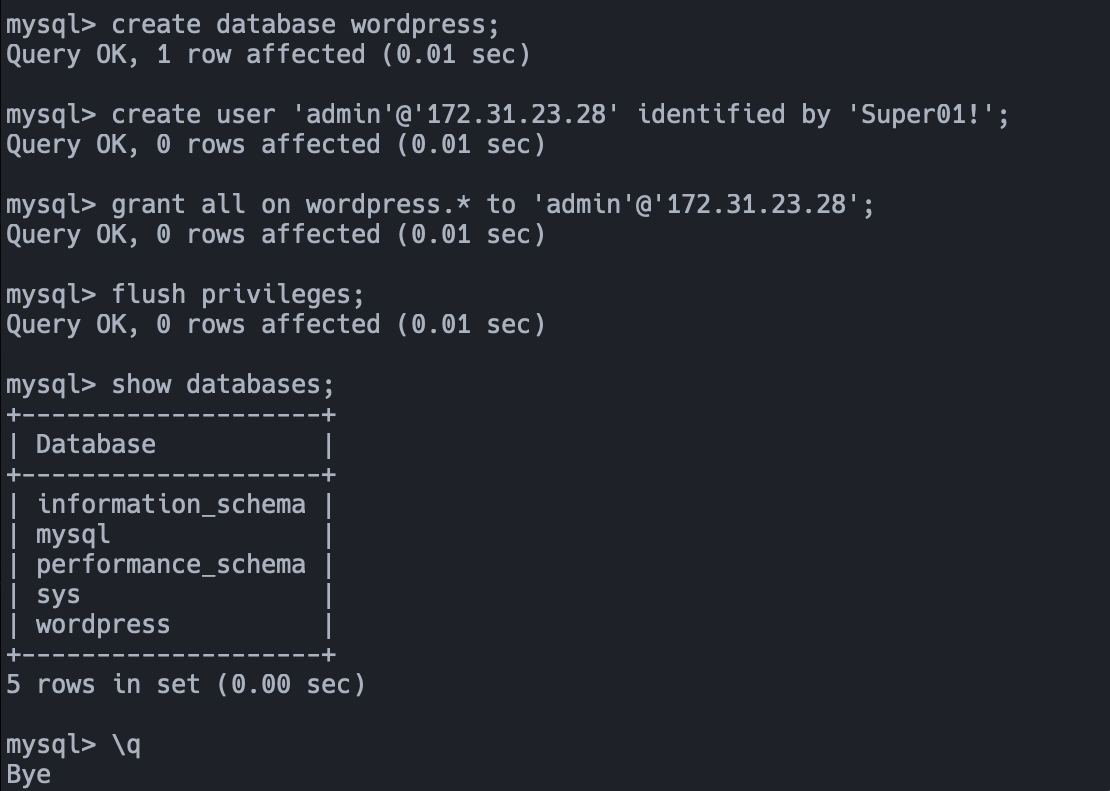
Configure DB to work with WordPress
Use sudo mysql to login as root and setup a database and a user with access to the database:
Configure WordPress to Connect to a Remote Database
For this, we need to open port 3306 on the DB Server instance's Security Group (SG). Furthermore, we should limit the source to our Web Server's private IP address:
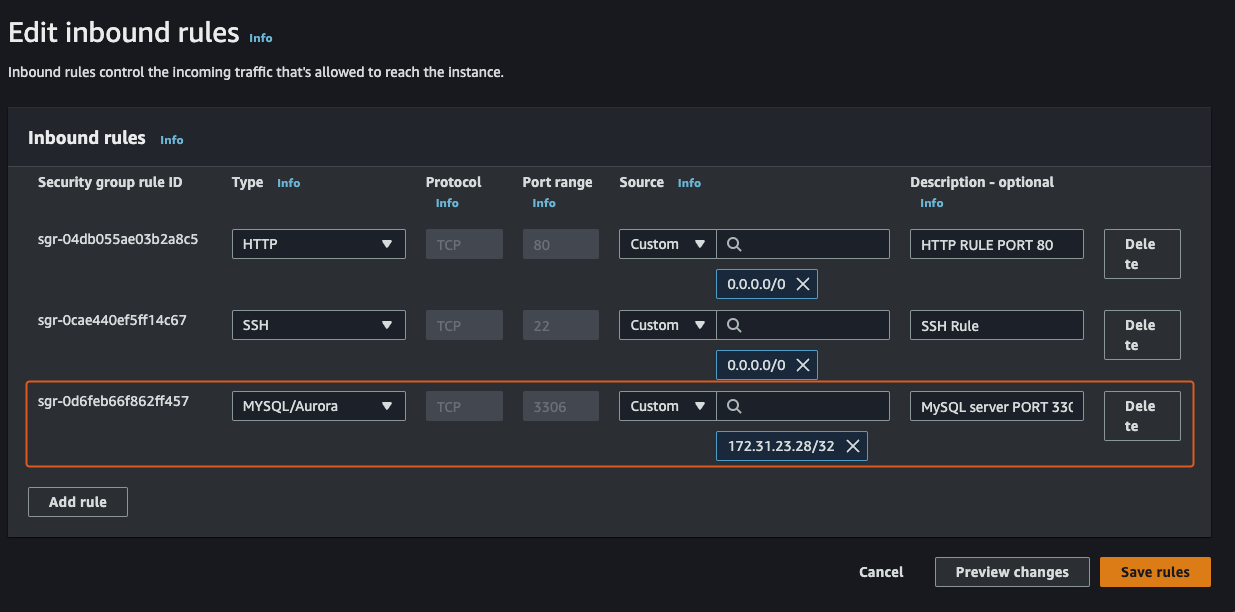
Additionally, we forgot to open port 80 on our Web Server's instance. I have already set up a specific SG for web servers, but reference the first rule in the image above for how it should appear.
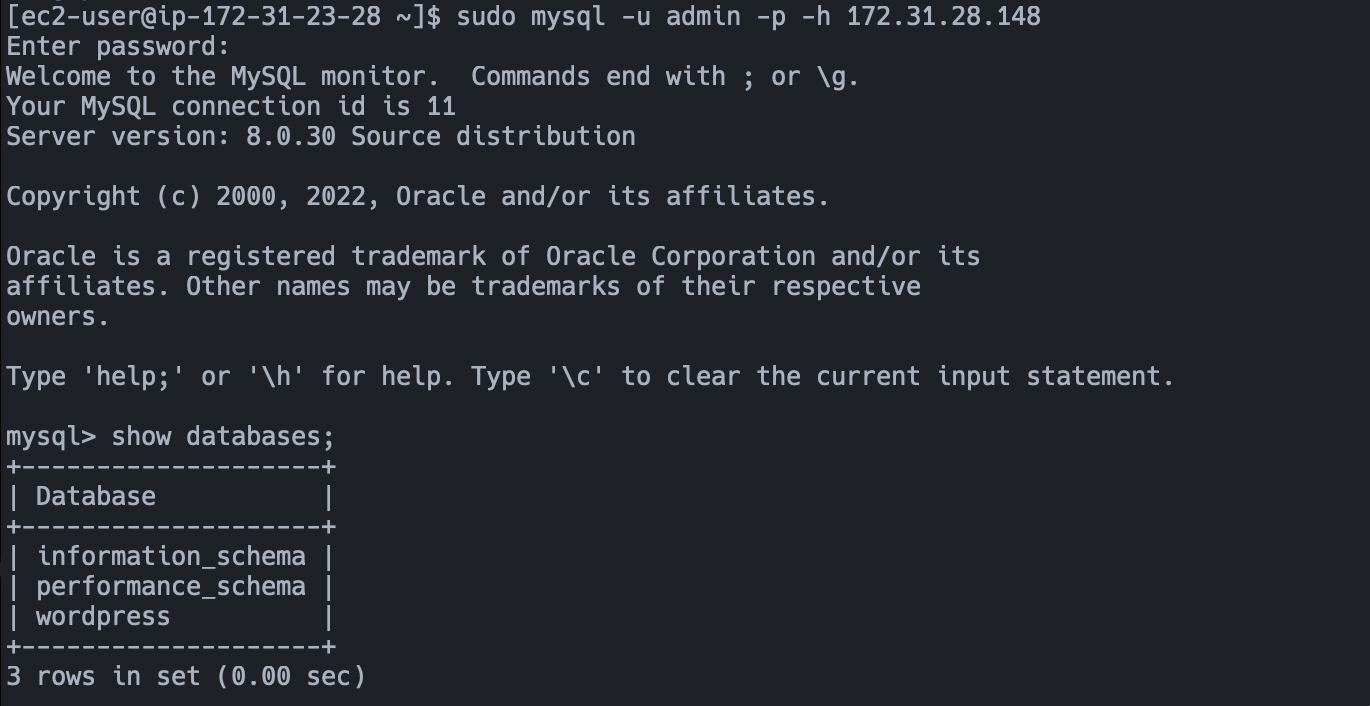
We should now be able to access our DB Server from our Web Server as we did in the previous project:
sudo mysql -u admin -p -h 172.31.28.148
View WordPress Site
With our Web Server running we should be able to view our WordPress site using the server's public IP address: `http://54.245.4.149/wordpress/`:
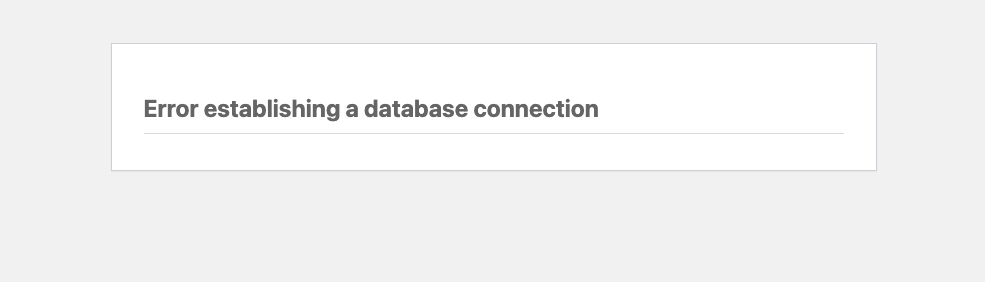
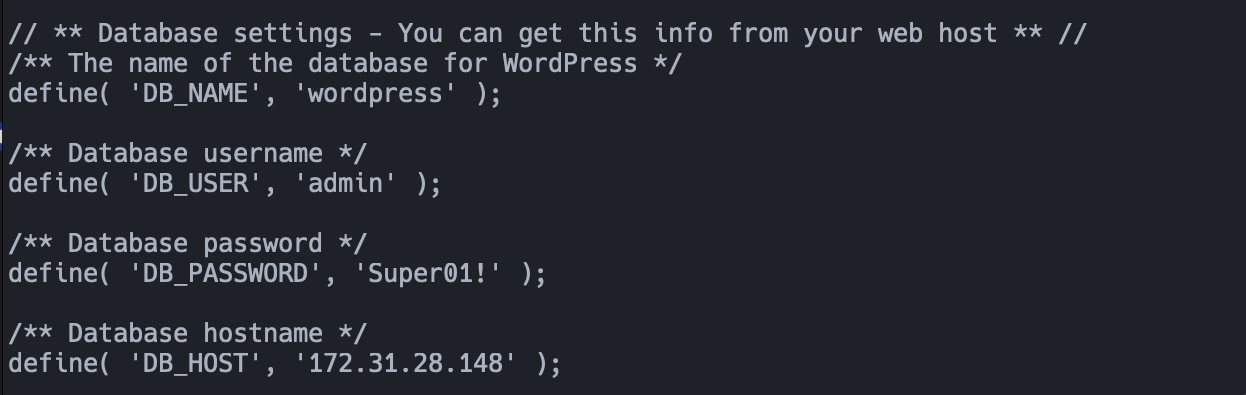
However, we come across the above error. All that's required on our part is to update our wp-config.php file to provide details regarding our database settings. This file is located in /var/www/html/wordpress/ . The DB_HOST value is our DB Server private IP address:
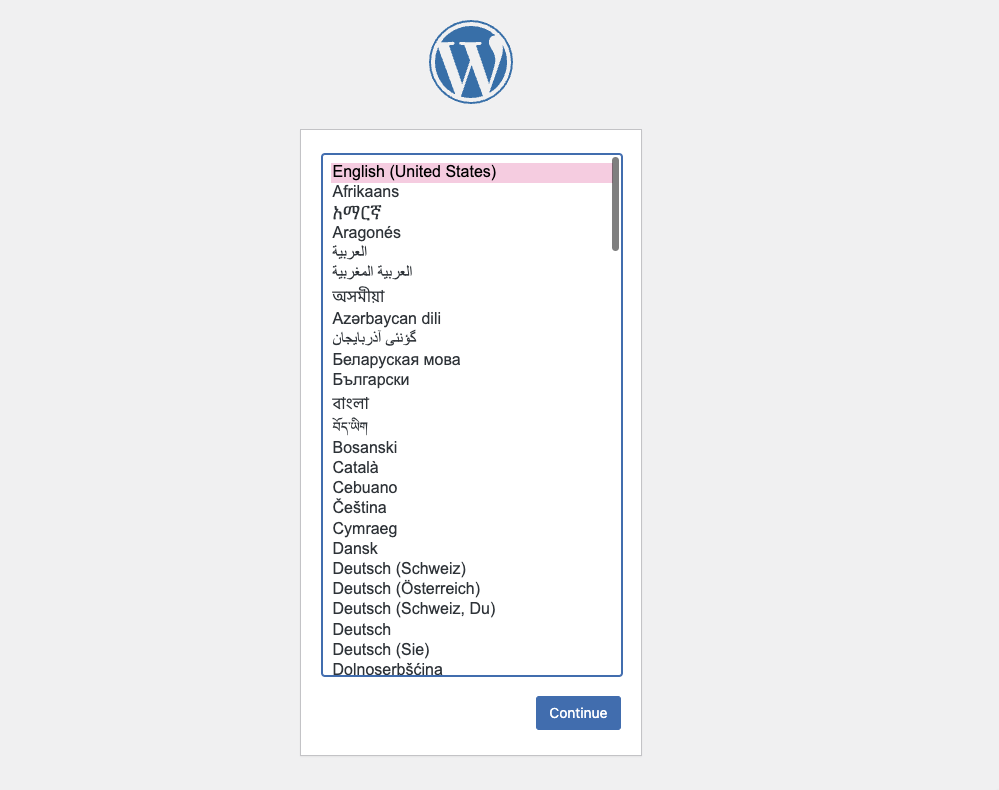
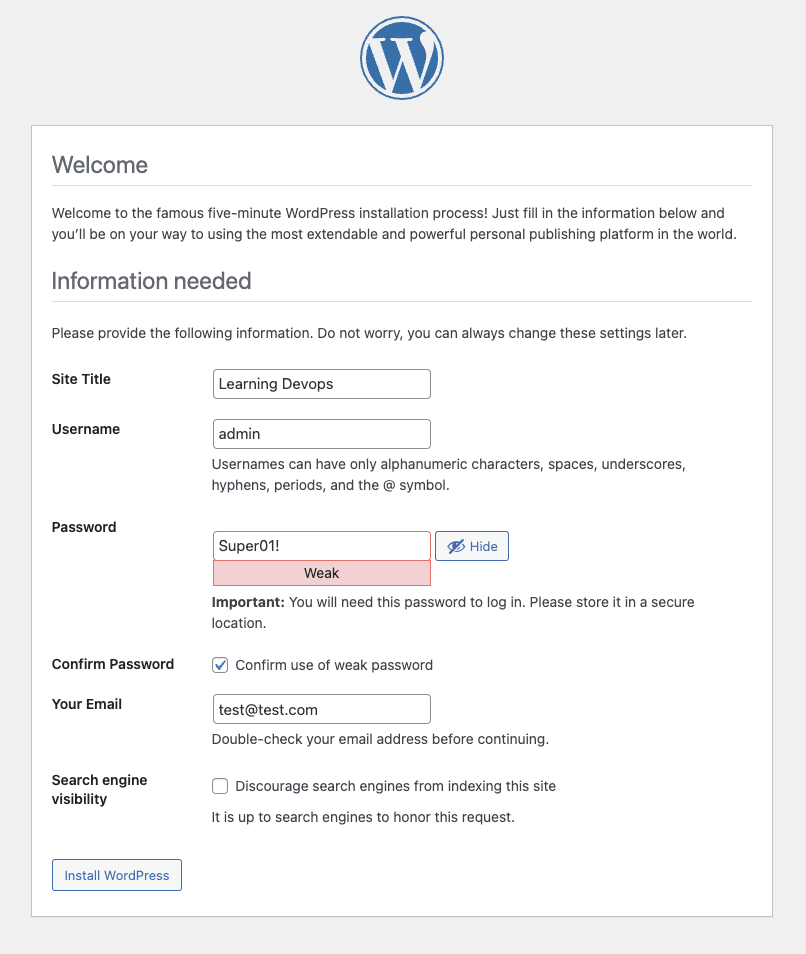
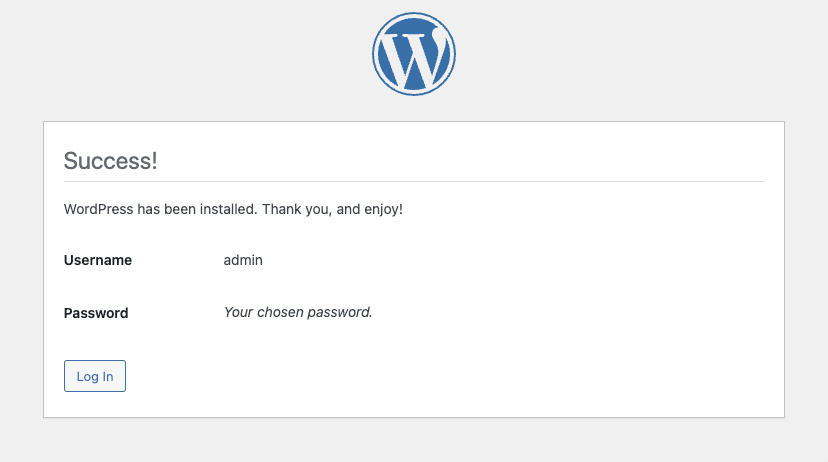
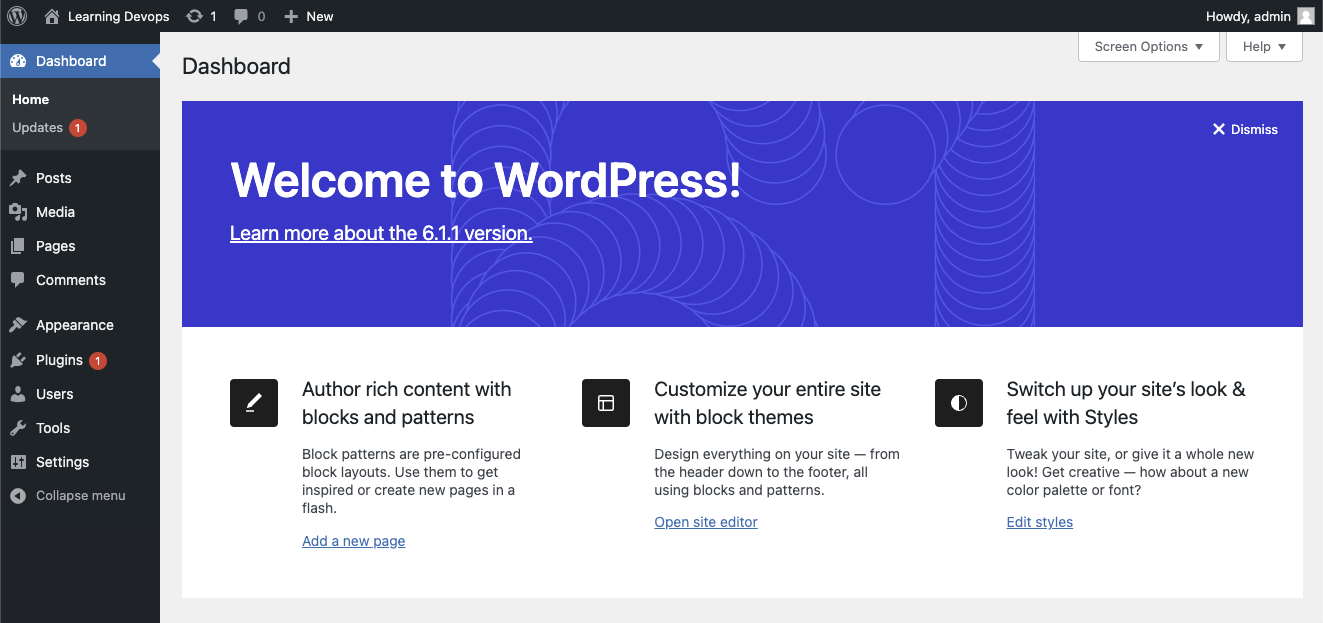
After reloading the page we should enter the install flow:
Note: Remember to Terminate the two instances and delete the volumes if no longer needed lest you incur added AWS costs.
Learning Outcomes
Creating & attaching volumes to EC2 instances
Creating Partitions, Physical Volumes, Volume Groups, and Logical Volumes
Mounting
Installing WordPress and configuring Database