


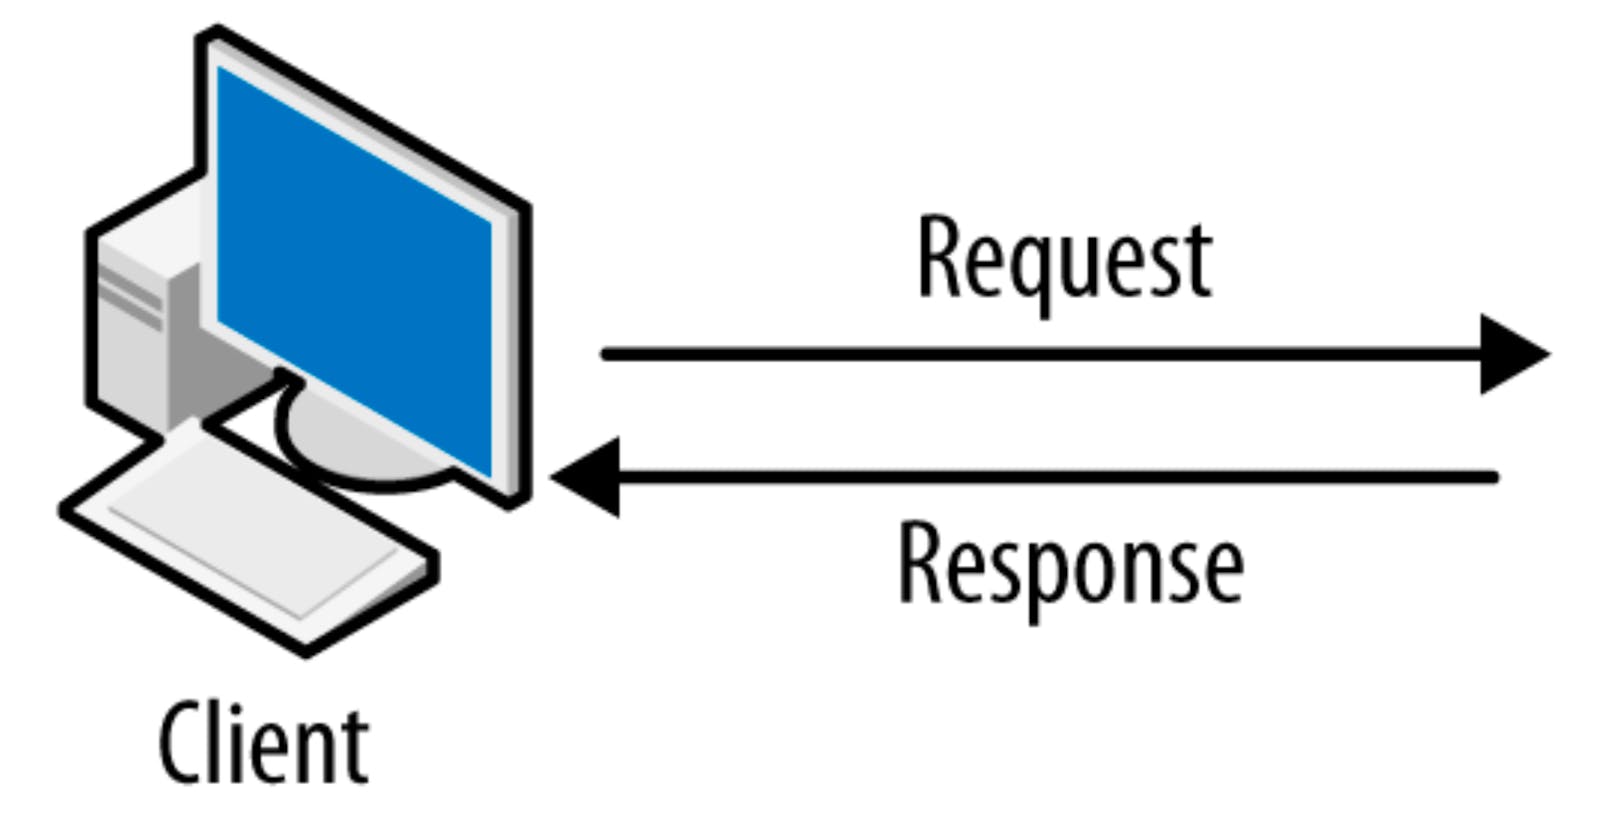
Client-Server refers to an architecture in which multiple computers are connected over a network to send and receive requests from one another. In their communication, each machine has its role: the machine sending requests is usually referred to as the "Client" and the machine responding (serving) is called the "Server".
In this case, our Web Server has a role of a "Client" that connects and reads/writes to/from a Database (DB) Server (MySQL, MongoDB, Oracle, SQL Server or any other), and the communication between them happens over a Local Network (it can also be an Internet connection, but it is a common practice to place Web Server and DB Server close to each other in a local network).
Implement A Client-Server Architecture
We need to start with two Linux ec2 instances - one to act as the client, and the other as the server
In the client one we need to setup mysql-client :
sudo apt update -y
sudo apt install mysql-client -y
As for server, we require mysql-server :
sudo apt update -y
sudo apt install mysql-server -y
Additionally, it would be best practice to update the root user password, run mysql_secure_installation , and reset some MySQL defaults.
Completing the above for the client is unnecessary since the client will just be accessing the server .
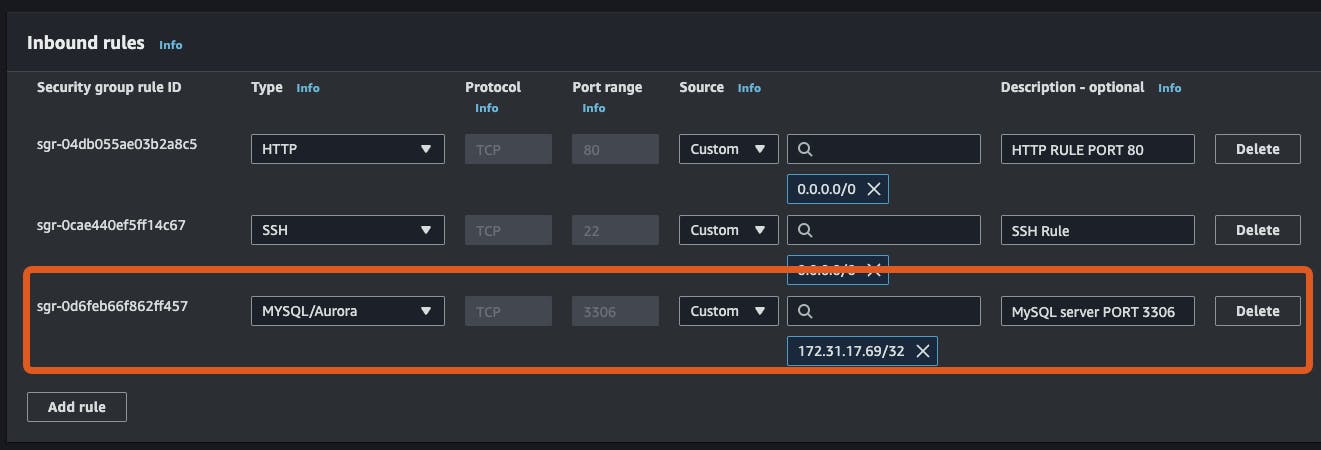
By default, both of your EC2 virtual servers are located in the same local virtual network, so they can communicate with each other using local IP addresses. MySQL server uses TCP port 3306 by default, so you will have to open it by creating a new entry in ‘Inbound rules’ in ‘MySQL server’ Security Groups. For extra security, do not allow all IP addresses to reach your ‘MySQL server’ – allow access only to the specific local IP address of the ‘MySQL client’.
You might need to configure the MySQL server to allow connections from remote hosts.
cat /etc/mysql.conf.d/mysqld.cnf | grep '^bind-address'
# bind-address = 127.0.0.1


sed -i 's/bind-address.*/bind-address = 0.0.0.0/' /etc/mysql/mysql.conf.d/mysqld.cnf

cat /etc/mysql.conf.d/mysqld.cnf | grep '^bind-address'
# bind-address = 0.0.0.0

sudo systemctl restart mysql
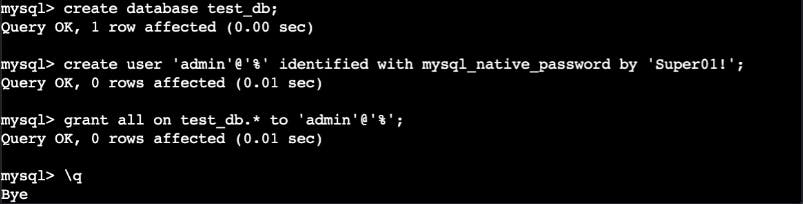
Let's create an admin user and test_db database from our server instance:
With the above setup, we can now connect to our MySQL server from our client using the above admin user. The -h option allows us to specify the IP or hostname of the MySQL server
# mysql -u <user> -p -h <host or ip address of mysql server>
mysql -u admin -p -h 172.31.30.207
We have now accessed the server as the client. Let's create a contacts table and populate it:

We should also be able to view that table and its row from the server instance and add additional rows to it.